If you use Google Chrome on your Mac, and chances are that you do, you must have noticed that it automatically updates itself. While this is definitely a good thing, partly because it saves you the trouble of updating yet another app, and partly (and this is important) because this means that you always have the latest security updates pushed to your browser. However, the problem is that if you want to disable automatic updates in Chrome, you simply can’t do it. There is absolutely no option in Google Chrome that will allow you to disable automatic updates for the browser. This is probably there so that users don’t disable updates, and end up making themselves vulnerable. But, if you really want to disable automatic updates for Google Chrome, you can follow the steps given below:
Check Chrome’s Update Check Interval
Google Chrome has a set interval at which it checks for any available updates. If it finds one, the update is automatically downloaded, and installed. While checking the current value of the update check interval is not really necessary, it is a good idea to do this, so you can set it back to default if you want to. To check the current check interval, simply follow the steps below:
1. Launch Terminal, and type “defaults read com.google.Keystone.Agent checkInterval“. Hit Enter.
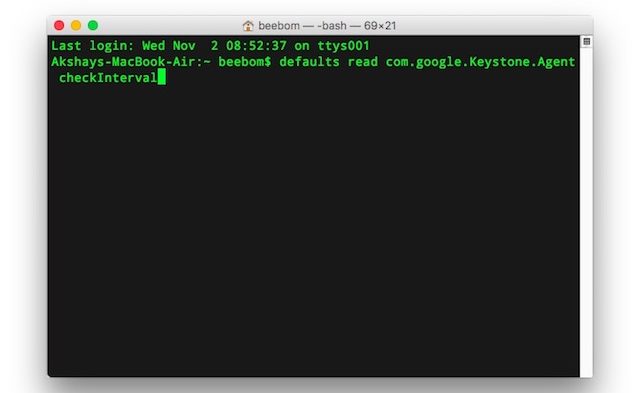
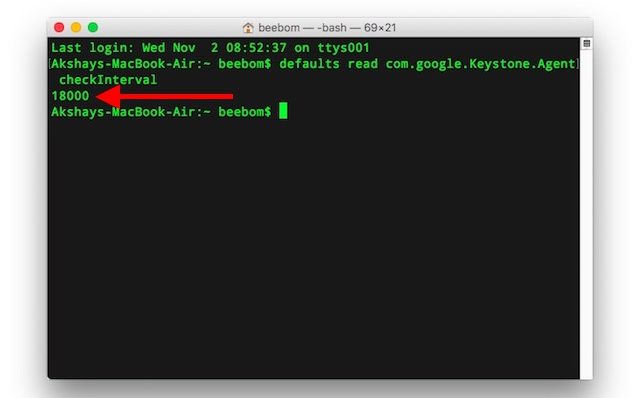
2. You will see a number in the next line. This is the amount of time (in seconds) that Google waits before checking for an update. Usually, this value is set at 18000 seconds, or 5 hours.
Disable Chrome Auto Updates
Note: It is not recommended to disable automatic updates for Google Chrome, as this will leave you susceptible to potential security threats, that Google might patch in a later version. Only do this if you know what you’re doing. Also, it is recommended to manually update Google Chrome every now and then, just to be on the safer side. I will tell you how you can manually check for updates at the end of this article.
All it takes is one command on the Terminal, and Chrome automatic updates will get disabled on a Mac. If you’re sure that you want to disable automatic updates for Google Chrome on your Mac, just launch Terminal, and type the command “defaults write com.google.Keystone.Agent checkInterval 0“.
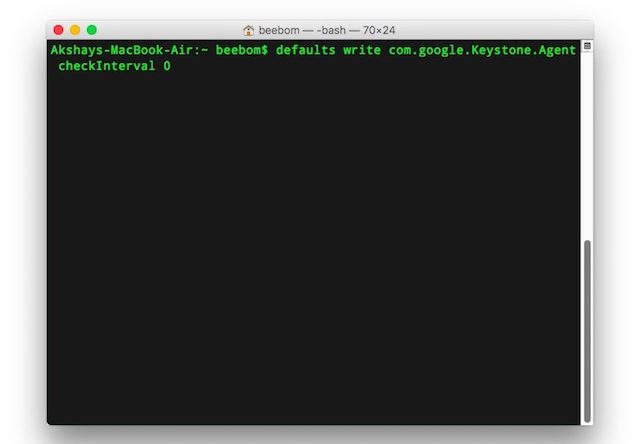
Setting the checkInterval to 0 basically makes Google Chrome not check for updates at all. This means that unless you check manually, Google Chrome will not update.
Manually Update Google Chrome
If you have disabled automatic updates for Google Chrome, I would definitely suggest that you still manually run the updater in order to keep the version updated. To manually run the updater, simply follow the steps below:
1. Launch Finder, and press “command + shift + G“. Or, you can click on “Go -> Go to Folder“. Here, type “/Library/Google/GoogleSoftwareUpdate/GoogleSoftwareUpdate.bundle/Contents/Resources/” and hit Enter.

Note: If that location doesn’t have anything, go to “~/Library/Google/GoogleSoftwareUpdate/GoogleSoftwareUpdate.bundle/Contents/Resources/”, instead.
2. Here, double click on “CheckForUpdatesNow.command“. This will launch the Terminal, and will check for updates. Once the process is done, you will see a message saying “[Process Completed]“.
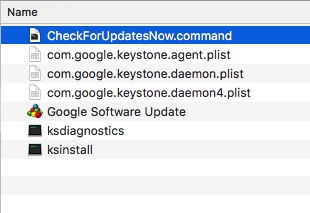
That’s it. You have successfully checked for any available updates. If any updates are available, they get installed on their own, and all you need to do is run the “CheckForUpdatesNow.command” program.
Re-Enable Automatic Updates
If you decide that automatic updates were probably better for you, you can always set them up again. All you need to do, is launch the Terminal, and type “defaults write com.google.Keystone.Agent checkInterval 18000“. This will set the update interval back to the default value that Google Chrome comes with. You will need to restart Chrome for the changes to take effect.
SEE ALSO: 10 Ways to Speed Up Google Chrome on PC or Mac
Enable or Disable Chrome Auto Updates
So, now you know how you can enable, and disable Chrome automatic updates. Feel free to play around with the settings, and change the update interval to any value you like (the maximum is 24 hours), to control the frequency at which Google Chrome checks for updates automatically. As always, if you have any issues with these methods, do let us know in the comments section below.
Featured Image Courtesy: Flickr



![How to Change MacBook Wallpaper [2024 Guide]](https://beebom.com/wp-content/uploads/2024/02/Macbook-wallpaper.jpg?w=300&quality=75)
![How to Zoom Out on Mac [2024 Guide]](https://beebom.com/wp-content/uploads/2024/02/How-Zoom-Out-on-Mac.jpg?w=300&quality=75)
![How to Select Multiple Files on Mac [4 Ways]](https://beebom.com/wp-content/uploads/2024/02/MacBook-Select-Multiple-Files.jpg?w=300&quality=75)
Tried & didn’t work 🙁 Can you suggest othe ways? Whilst I appreciate all your warnings about vulnerability, the overriding imperative for me is to retain functional software. Google updates frequently disable functionality. If I could, I would run a version of chrome that allowed disabling the repulsive horror show that is tabbed browsing. With the coming abandonment of Flash, I want a browser that is flash capable. Above all as one of the many with an unreliable and slow broadband I want to control when downloads take place.
flash is dead. Since 2021 there will be no support from flash. It’s dead. Don’t use it
That comment is unnecessary. I use flash, period. It might be being killed, but it is a functional tool for me. Computers are tools for a purpose, not lifestyle experiences
Hoped this would work, but it doesn’t seem to. Chrome updated again to the latest messed up version, 61. I rechecked to make sure it is reading zero, it is, didn’t make any difference. Maybe Chrome has changed it’s method for checking when to update?
I have the same problem; checkInterval is set to 0, but Chrome has bypassed that and updated itself anyway.
Fantastic – thanks so much for this!