


Windows has of habit of running into problems when you least expect it to and that can create a lot of troubles. So, it’s important that you keep a backup of all your important files and folders. While backing up your files and folders is a good idea, Windows lets you create a backup of the whole operating system, which can help you restore or repair a Windows PC to working condition.
Windows 7 introduced the ability to create a recovery drive or disk and Windows 10 too includes the feature. However, the option is a little buried in the Control Panel. So, without any further ado, here’s how you can create a recovery drive or disk in Windows 10:
Note: A 64-bit recovery image can only be used to repair or restore PCs running the 64-bit version of Windows 10. The same goes for the 32-bit version as well.
What You Need:
- 1 GB or above (depending on your data) USB flash drive or an empty disk.
- CD/DVD drive (if using the disk method)
- A working version of Windows 10
Creating a Recovery Drive
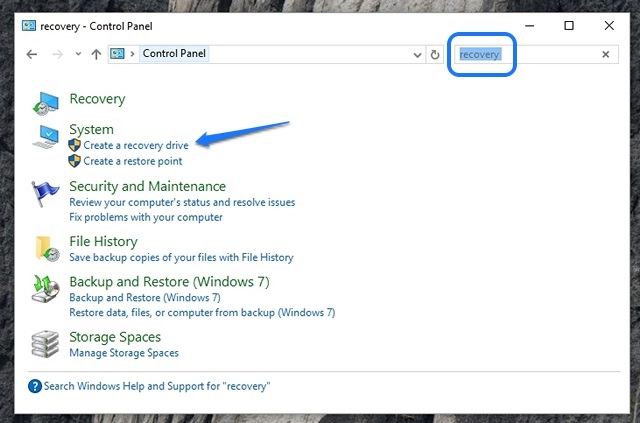
1. Open Control Panel and search for “Recovery” through the search box in the top right. From the results, click on “Create a recovery drive” option, under the System section.
2. After you have accepted the prompts, the Recovery Drive dialog box will open up. Here, you can choose to back up system files or not.
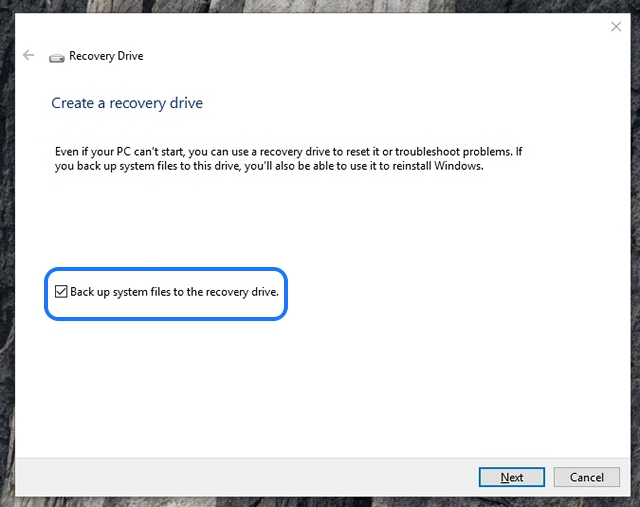
Note: We’d recommend you to back up system files, however that will result in the process taking longer time. For instance, when we backed up the system files, the size of the recovery was below 4 GB and when we unchecked the option to back up system files, the size was below 512 MB.
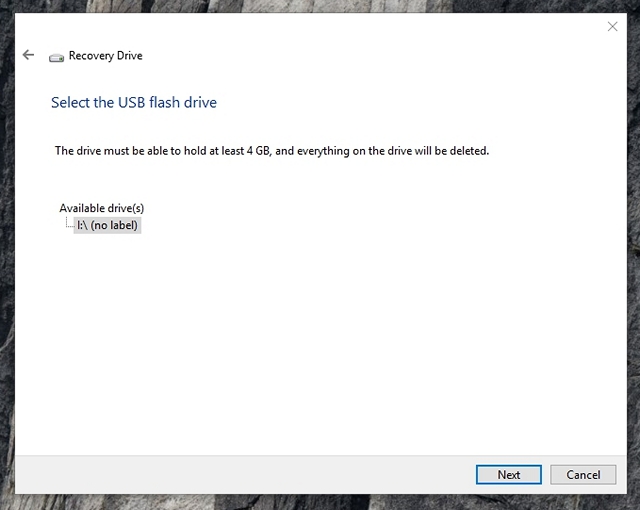
3. Then, you’ll have to select the USB flash drive. Just select the drive and click “Next”. Then, a warning will be shown to you suggesting that the USB flash drive will be formatted and you will lose whatever files you have in the drive. So, it’s important to make sure that you don’t have any important files in the drive.
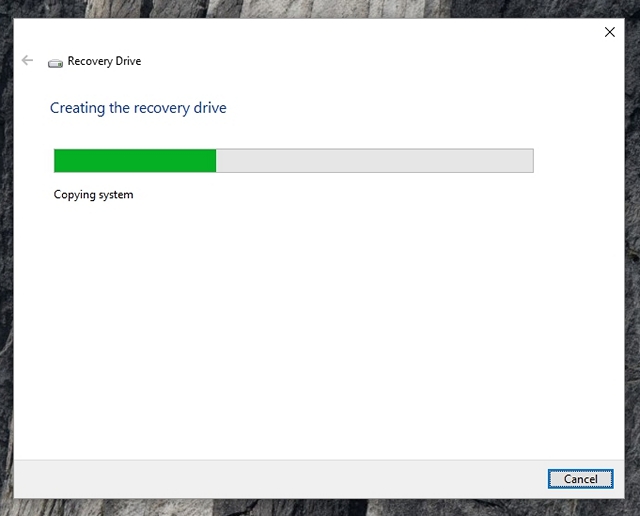
4. The recovery process will then start up. It will take around 20 minutes if you are backing up system files and less than 5 minutes otherwise.
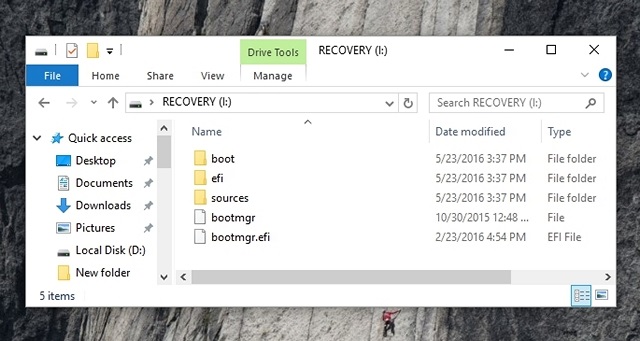
5. After it’s finished, you will see your USB flash drive renamed “Recovery”, with the recovery files.
Creating a Recovery Disk
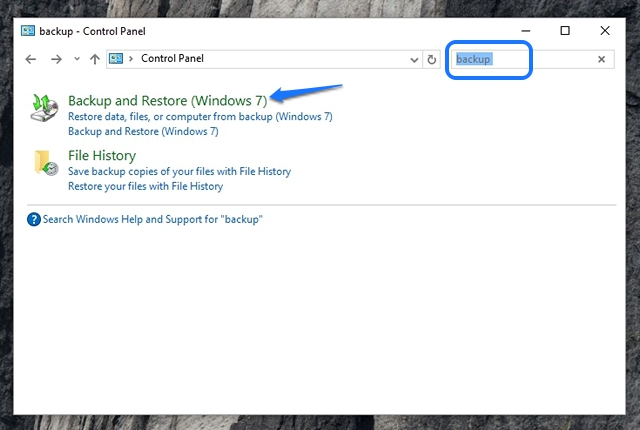
1. Open Control Panel on Windows 10 and search for “Backup and Restore”. Select the first results that says “Backup and Restore (Windows 7)”.
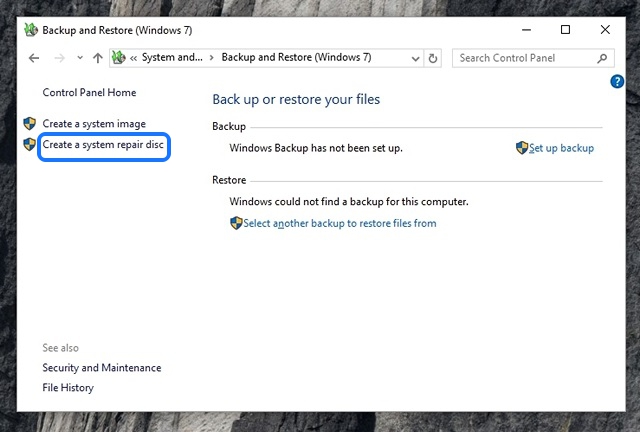
2. In the Backup & Restore page, click on the option in the left bar that says “Create a system repair disk”.
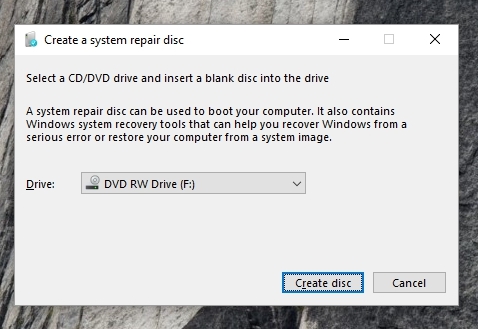
3. Then, select the DVD drive and click on “Create disk”.
4. The process will then start and your recovery disk will be created.
SEE ALSO: How to View Saved WiFi Passwords in Windows 10
Restore or Repair your Windows 10 PC with Recovery Drive or Disk
Once the process is complete, you can use the recovery drive or disk to restore or repair your Windows PC in case things ever go wrong. To do it, you will have to boot directly through the recovery disk or drive and go to Advanced system options->Troubleshoot->Recover.
The recovery disk or drive should most probably repair your PC but in case, it fails you might have to reset your PC. Well, that’s all you need to know when it comes to creating recovery drives and disks. Let us know if you have any doubts in the comments section and you can surely an expect an answer from us.


 Arjun Sha

 Abubakar Mohammed
Arjun Sha
Abubakar Mohammed
Arjun Sha
 Arjun Sha
 Arjun Sha
 Satyam Kumar
 Satyam Kumar
 Arjun Sha

Why does the request to create a windows 10 recovery disc result in a dialog box in Control Panel talking about a windows 7 recovery disc?
Thank you Rupesh This is 2016. I bought my ll-in-one last year and none of this is available. This perverts are always ahead one step in hiding stuff.