Whether it’s hassle-free file storage, neat synchronization, deep integration with G-Suite of apps, and Maps, Google Drive has fully covered. Couple that with the 15 GB of free storage (shared across Gmail, Drive, and Google Photos) and it becomes hard to beat Google’s feature-rich cloud-storage service. It’s been a while since I started using Drive for file storage and I must say that the cloud service has lived up to my expectation. Having explored all the goodies that the cloud storage service has to offer, I have lined up an extensive roster of 20 Google Drive tips and tricks which you would love to master.
Best Google Drive Tips and Tricks (2022)
Google Drive is as popular on mobile devices as it is on the web. So, it’s apt to include tips for both platforms. Keeping in mind customization, the roundup also features hacks that let you either fill up the void or fine-tune preferences in sync with your workflow. Enough talk, let’s get started!
1. Voice Typing
When you are creating a Google Docs file, you can use Google’s in-built speech-to-text system to type using your voice. It works surprisingly well, too. Even better, the speech recognition tool can also understand commands such as “newline” and “period”, and it responds to them by creating a new line, or by inserting a period into the text.
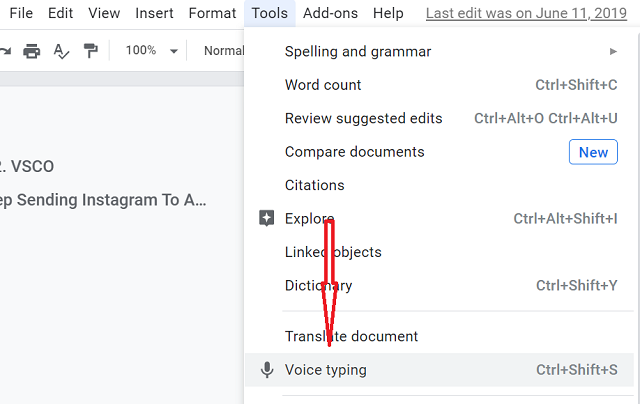
Unfortunately, this feature doesn’t work on Safari (because Safari doesn’t support WebRTC), but it works on most major browsers, including Google Chrome, Firefox, Edge, etc. To use Voice Typing, you simply have to go to Tools -> Voice Typing in a Google Docs file.
2. Add Links to Documents Without Leaving the Web App
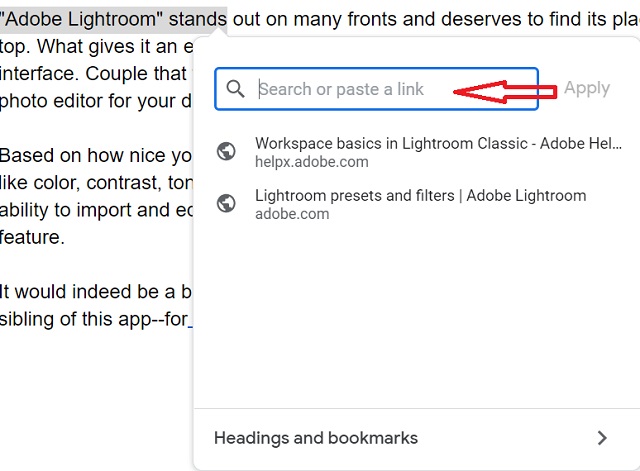
Having to constantly search for things on the web, copying their links, and adding them to a document can quickly get annoying and tedious. Google Drive fixes this as well. You can simply select the text you want to create a hyperlink on, and press “Cmd+K” or “Ctrl+K“. This will open up a small dialog box just below the selected text, where you can search for keywords and choose the appropriate link, which will then automatically get hyperlinked in the document.
3. Publish Files to the Web
Google Drive also offers a feature to publish Docs files, Sheets, or Slides to the web. This bypasses the need to share links to the doc with people. Items published on the web using Google Drive can be shared via a link, or they can be embedded into a webpage. The best part about using Google Drive’s “publish to the web” feature is that you can set it up to be updated whenever you make changes to the file. This means that the published content will automatically get updated whenever you make an edit to the original file.
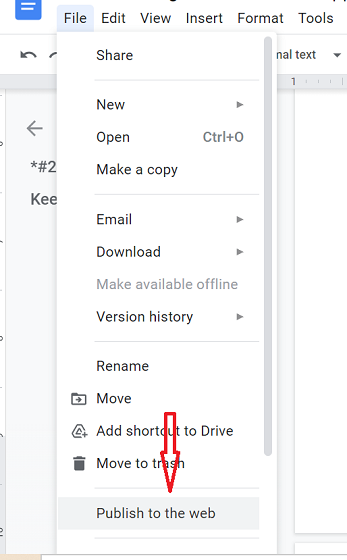
To publish a file to the web, you can simply open the file in Google Docs and go to File -> Publish To The Web.
4. OCR on Images and PDFs
Google Drive also has a rather neat OCR feature hidden away inside the web app (and the Android app, unfortunately not in the iOS app). This feature can recognize the text inside your images and PDFs and create an editable, searchable Google Docs file. Isn’t that awesome? The limitation of this method is that the text should be neatly written, and should preferably properly contrast with the rest of the image, or the OCR might not be able to recognize the text properly.
Also, OCR on Google Drive doesn’t keep formatting intact when it converts the document into a Google Docs file, this means that any formatted text will be recognized as normal text, without any formatting.
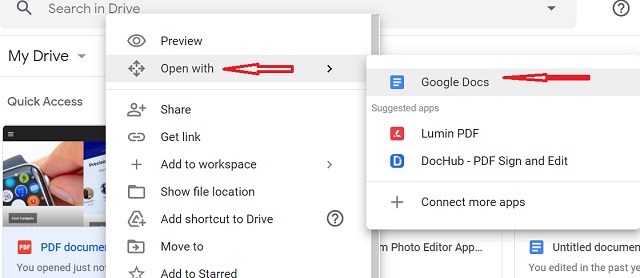
To use OCR on your images or PDFs, simply upload them on Google Drive. Then, right-click on them and select “Open in Google Docs“, and Google Drive will convert the image/PDF into an editable “text-only” file.
I tested the OCR capabilities of Google Drive by creating a sample JPEG consisting of text, a table, formatted text, and some text in calligraphy fonts.
This is in no way the best recognition you can get on an OCR, but it will work for your basic needs. If you need OCR software that can flawlessly recognize and extract text, data, and formatting from your documents, you can check out our article on the best OCR software.
5. See your Files Sorted by Size
Google Drive sorts uploaded files and folders by the “Latest Modified First” rule. This can be useful as it ensures that the files you uploaded the most recently are present at the top, for easy access. However, if you are running low on available space on your Google Drive account, you might want to sort the files by their size, to figure out where you can save space the most.
While there isn’t directly a way to do this, you can still get Google Drive to arrange files by size, by following the steps below:
- On the Google Drive homepage, hover your mouse on the “Upgrade storage” option at the bottom of the left panel.
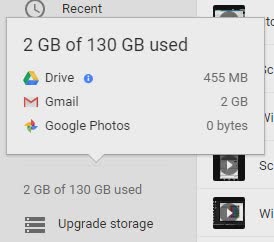
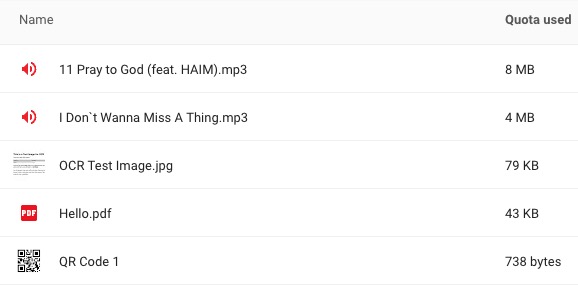
This will bring up a window with the breakdown of your usage, click on “Drive“, and Google Drive will sort all your files by Size.
6. Check your Write-up For Plagiarism and Grammatical Errors
Google Drive has a lot of add-ons available that can greatly increase the productivity and effectiveness of using Google services such as Google Docs, Sheets, etc. One such add-on is called ProWritingAid, and it is a tool that can check your document for grammatical mistakes, spelling mix-ups, and plagiarism, among a lot of other features.
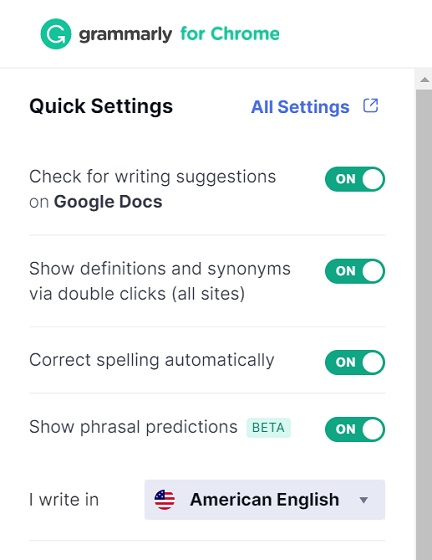
The Chrome extension is available for free with limitations. The premium version is available for $20/month. Another equally efficient grammar check that I would recommend you to try is Grammarly. It’s also available for free with restrictions. The premium version of Grammarly starts from $29.95/month.
7. Automatically Save Emails and Attachments to Google Drive
Another add-on for Google Sheets, called Save Emails and Attachments, does exactly what its name implies. You can define rules based on the sender’s email ID, the subject, message size, attachments, etc, and the add-on will run every hour automatically, and sync emails from your Gmail email account into a spreadsheet. It also saves a copy of the email as a PDF inside Google Drive, along with any attachments in the email.
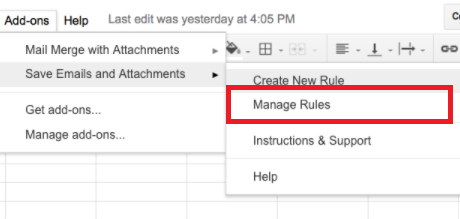
The add-on can also be run manually if required, by going into Add-ons->Save Emails and Attachments -> Manage Rules -> Run Manually.
8. Check Word Count
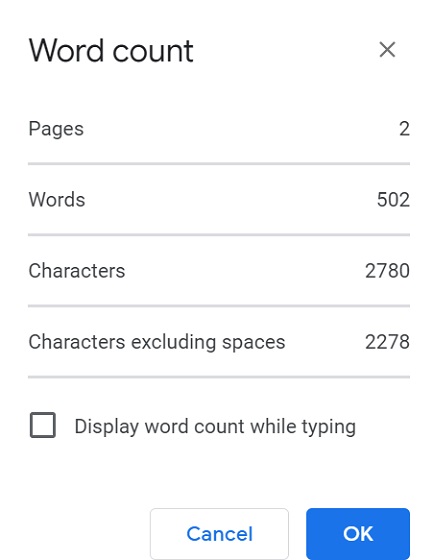
While writing any story or extensive article, I like to keep a track of the word count just to ensure I don’t go overboard. It sort of helps me maintain the speed required to complete the article before the stipulated time. Thankfully, checking word count in Google Docs is quite straightforward not only on the web but also on the mobile app (iOS/Android).
On the web: Click on the Tools option and choose Word Count. Alternately, you can also use the CTRL/CMD+SHIFT+C to quickly bring up the Word Count window showing the number of words, pages, and characters. To make the task of tracking word count even easier, check the box to the left of the Display word count while typing.
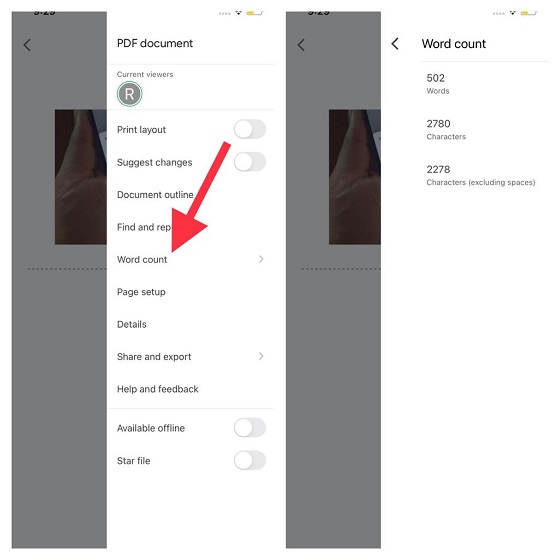
On iOS/Android: Open the file and then tap on the menu button at the top right corner of the screen and choose Word Count. Now, you should see the total number of words and characters.
9. Customize Accessibility Settings
One of the lesser-known Google Docs features is the Accessibility settings which can be very helpful for differently-abled people. It provides screen reader and magnifier support. Besides, there is also an option to enable collaborator announcements that make it a tad easier to know when people enter and exit their files.
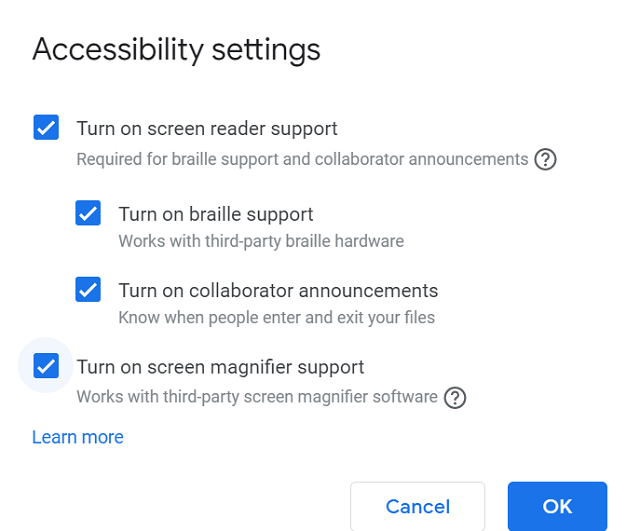
Open any doc and then click on Tools. After that, select Accessibility settings. Now, customize the settings in line with your preference.
10. Fine-Tune Preferences
It’s always better to have the desired control over preferences so that you can fine-tune each important aspect as per your needs. To have a fully personalized experience, Google Docs let you customize your preferences. For instance, you can choose to disable smart quotes, turn off automatic correction of spelling and disable the action items suggestions. What’s more, you can also fine-tune substitutions in keeping with your specific requirements.
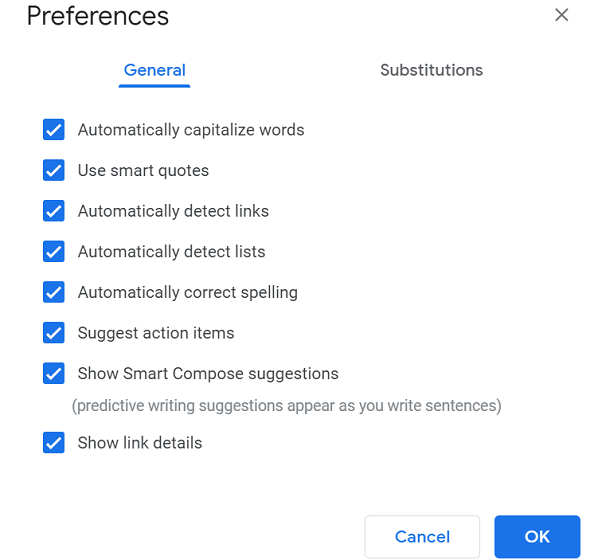
Open any doc and then click on Tools. After that, select Preferences. Now, customize Google Docs preferences and substitutions. In the end, make sure to click on OK to finish.
11. Customize Your Default Apps on iPhone and iPad
For a more personalized experience, Google Drive lets you customize default apps. For instance, you can choose Google Chrome as the default browser instead of Apple Safari, make Gmail the preferred choice, and set Google Maps as the default choice for navigation.
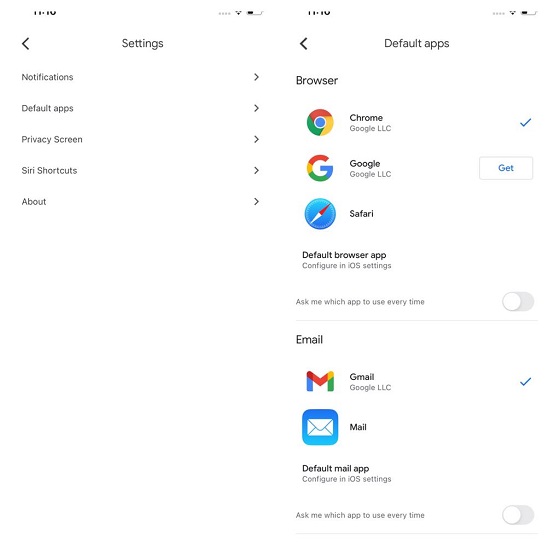
To select your default apps, open Google Drive on your iOS or iPadOS device. After that, tap on the menu button at the top left corner of the screen. Next, select Settings and then tap on Default Apps. Now, select the app which you want to use as the default option and then quit the settings.
12. Lock Google Drive with Face/Touch ID
Whether you no longer want anyone to use Google Drive without your permission or wish to add an extra layer of safeguard to block unauthorized access, the “Privacy Screen” feature is for you. When this privacy-centric feature is turned on, access to Drive will be restricted to Touch/FaceID.
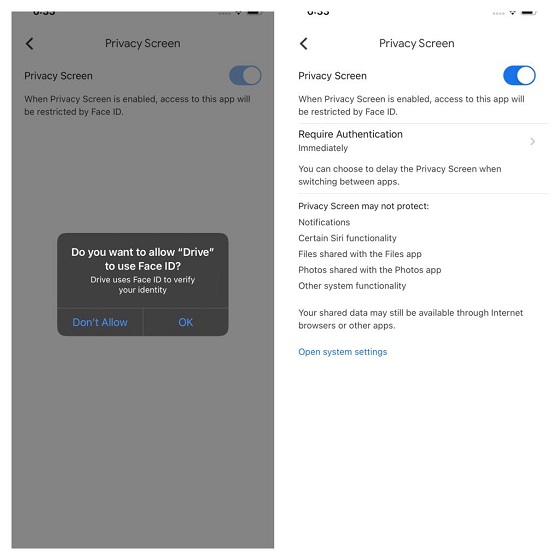
Head over to Google Drive -> menu button at the top left corner of the screen -> Settings -> Privacy Screen. Now, turn on the toggle right next to Privacy Screen. Now, you will get a popup saying, “Do you want to allow ‘Drive’ to use Face ID? Drive uses Face/Touch ID to verify your identity.” Tap on OK to confirm the action.
After that, you have the option to require authentication immediately (it’s a default choice). However, you can choose to delay the privacy screen when switching between apps. There are four options to choose from:
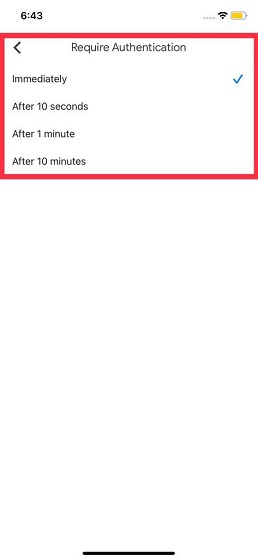
- Immediately: Lock Google Drive immediately after you leave the app.
- After 10 seconds: Require authentication after 10 seconds
- After 1 minute: Require authentication after 1 minute
- After 10 minutes: Require authentication after 10 minutes
Bear in mind that Privacy Screen may not protect your notifications, certain Siri functionality, files shared with the Files app, photos shared with the Photos app, and other system functionality. Also, do note that your shared data will remain available through internet browsers or other apps.
13. Use Siri Shortcut with Google Drive
Siri shortcuts are super handy as they let you unlock several possibilities with ease. And guess what, Google Drives also supports Siri shortcuts so that you can get the most out of the cloud-storage service on your iOS or iPadOS device.
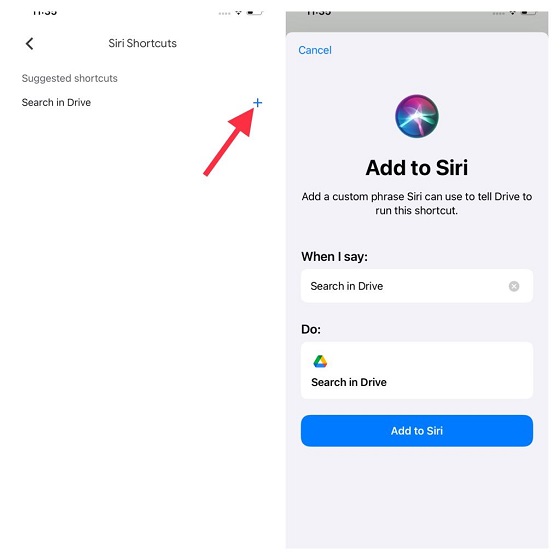
To get going, open Google Drive on your device and tap on the menu button at the top left corner of the screen. Now, select Siri Shortcuts. Next, tap on the “+” button next to Search in Drive. After that, add a custom phrase and then hit Add to Siri. Going forward, you can use this custom shortcut to perform the desired action.
14. Check the Entire Details and Activity of Shared Files
One of my favorite Google Drive features is the ability to keep a track of the entire details and activities of shared folders. Many a time, I have to check the details to either fix any issue or stay in sync with collaboration. And that’s when this nifty little feature comes in handy in finding out every subtle detail.
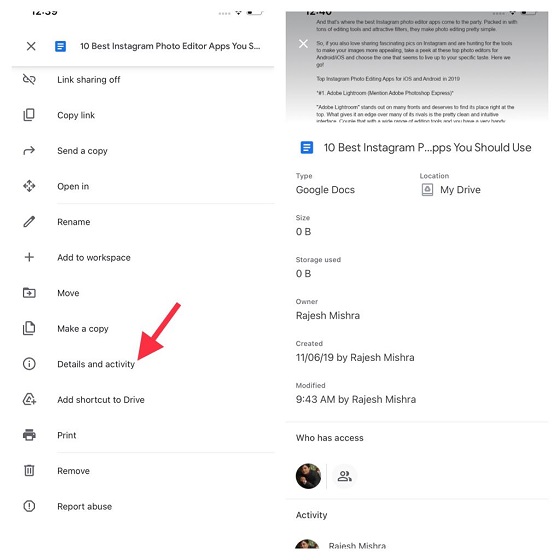
If you also find this feature helpful, open Google Drive on your device and then tap on the three dots icon located at the top right corner of any doc. After that, scroll and choose Details and activity. Now, take a close look at the essential information like who is the owner of the project and who modified it last time.
15. Customize Notifications
Notifications can be both a boon and bane. While the unnecessary ones can eat into your patience, the important ones can enable you to remain in sync with things that matter to you. So, if you no longer want to let redundant alerts annoy you and receive only the essential notifications, you should ideally fine-tune Google Drive notifications.
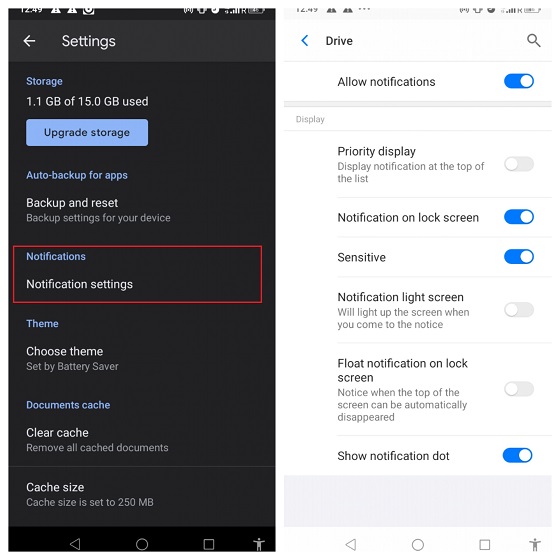
Open the Google Drive app on your device and then tap on the menu button. Next, tap on Settings. Next up, tap on Notifications (on Andriod, tap on Notifications Settings). Now, customize the alerts depending on your needs (On iOS, first turn on the Notifications toggle and then turn on/off respective options).
16. Enable Dark Mode
Dark Mode has become (more or less) my default choice. Though I mainly use it at night to safeguard the eyes against burning/straining, it also comes into play whenever I wish to extend the battery life of the device. Considering the multiple advantages, you shouldn’t give it a miss either.
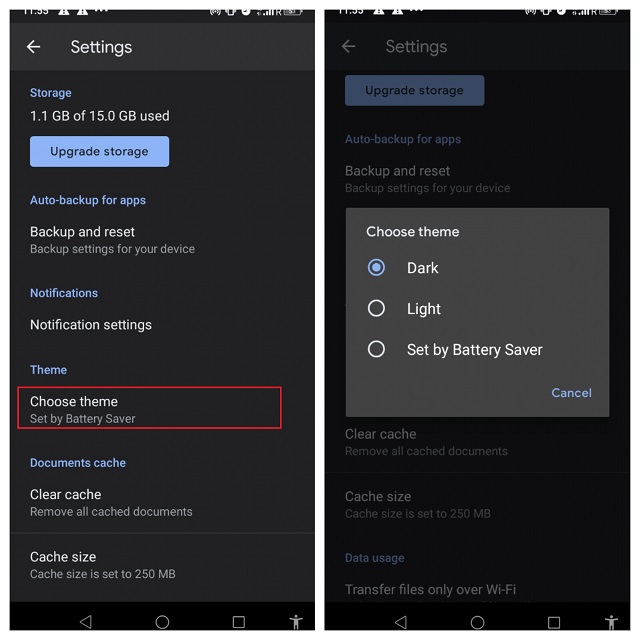
So, if you want to take advantage of the dark theme, navigate to Google Drive on your Android device. Then, tap on the menu button and choose Settings. After that, tap on Choose theme option and then select Dark. The change will come into effect immediately.
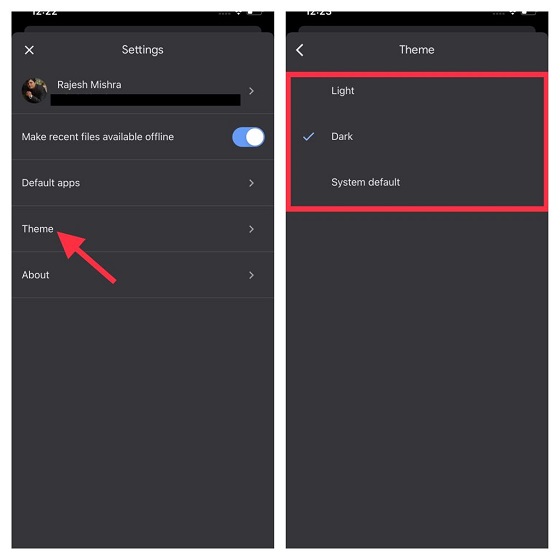
On your iOS device, open Google Docs and then tap on the menu located at the top left corner of the screen. After that, tap on Settings and choose Theme. Next, select Dark or System default.
17. Translate Documents in Google Docs
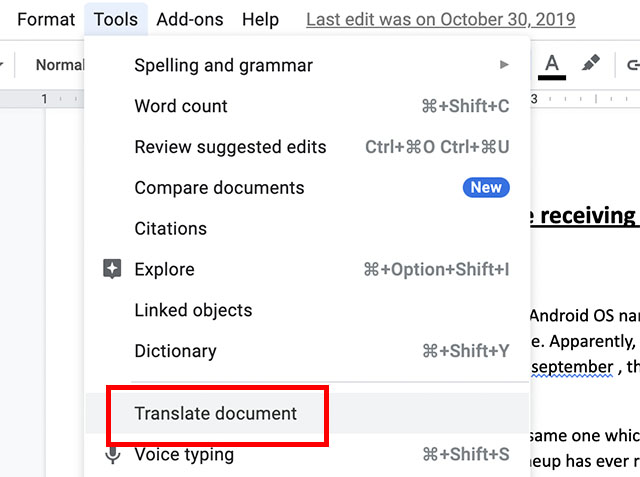
Did you know that Google Drive can easily translate entire documents for you on the fly? Yeah, it’s no secret that Google Translate is one of the most powerful and accurate translation services out there, and obviously, it’s integrated well with Google’s cloud storage solution. Here’s how to translate entire documents into Google Docs.
- Simply open the document in Docs. Then, head over to Tools -> Translate document.
- Here, you can select the language you want to translate the document into and click on ‘Translate’.
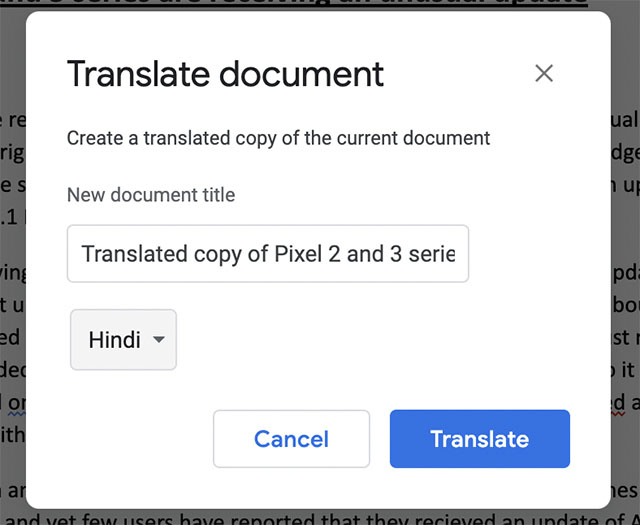
That’s it, Drive will translate the document for you and open it up in a new tab for your perusal. Pretty cool, right?
18. Use Different Colors for Folders
If you’re reading this article, chances are you’re a fairly advanced Drive user or trying to be. Well, if you use Google Drive extensively, you should probably consider color-coding your folders to better organize your digital life online.
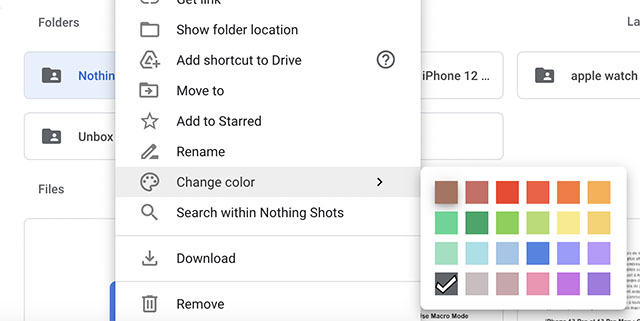
Within Google Drive, just right-click on any folder and go to ‘Change Color’. Here, you can select any color from a fairly wide palette of choices available to you. You can use this to make your folders visually appealing or to code them according to priority or any other manner that suits your usage.
19. Keep Multiple Versions of a File
Have you used git to manage source codes? Well, Google Drive brings a similar version control system for your files. If you’re storing any document (PDF, image, etc) in Google Drive you can keep uploading new versions of the file whenever you make changes, and keep a track of older versions easily.
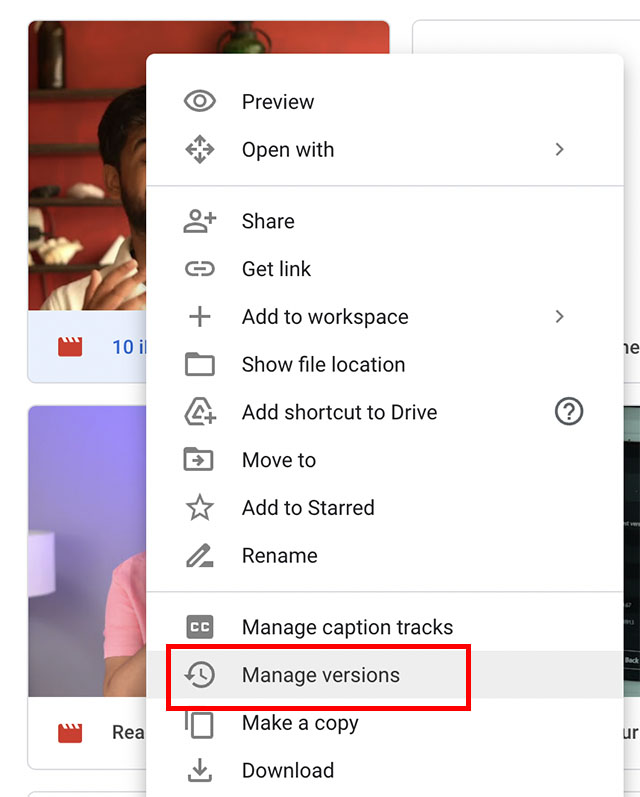
Simply right-click on a file you have uploaded to Google Drive and click on ‘Manage Versions’. You can then upload new versions of the document without creating duplicates every time.
Do note that you should select the ‘Keep Forever’ option when uploading new versions, otherwise the older versions will get deleted after 30 days.
Note: This feature only works for PDFs, images, videos, and other such files. It will not work with Google Docs, Sheets, or Slides documents.
20. Complete List of Google Drive Keyboard Shortcuts
If you are anything like me, you prefer using the keyboard to navigate as much as possible around your devices. Using keyboard shortcuts is not only easier but also ends up saving a lot of valuable time. If you’re not convinced, consider what is easier: copying text using “Ctrl+C” or by right-clicking, and selecting “Copy”? This applies to almost everything that we do on our devices, and Google Drive is no exception.
If you are looking to expand your knowledge of the keyboard shortcuts that work inside Google Drive’s web app, you can simply press Ctrl + / (Chrome OS, Windows) or ⌘ + / (Mac), and you will be shown an extensive list of all the different keyboard shortcuts that are available in Google Drive.
Navigation and views Go to the navigation panel (folders list) g then n
g then fGo to items view g then l Switch between grid and list in items view v Go to the details pane g then d Go to the top of the application (Google bar) g then t Go to download status g then a Go to upload status g then u Show or hide details pane d Show or hide activity pane i Select items Select or deselect an item x Select the next item down j
Down arrowSelect the next item up k
Up arrowSelect the next item to the left h
Left arrowSelect the next item to the right l
Right arrowExtend selection down Shift + Down arrow Extend selection up Shift + Up arrow Extend selection left Shift + Left arrow Extend selection right Shift + Right arrow Select all visible items Shift + a Clear all selections Shift + n Move between items Move down without changing the selection Ctrl + Down arrow (Chrome OS, Windows)
⌘ + Down arrow (Mac)Move up without changing the selection Ctrl + Up arrow (Chrome OS, Windows)
⌘ + Up arrow (Mac)Move left without changing the selection Ctrl + Left arrow (Chrome OS, Windows)
⌘ + Left arrow (Mac)Move right without changing the selection Ctrl + Right arrow (Chrome OS, Windows)
⌘ + Right arrow (Mac)Take action on selected items Open selected item Enter
oRename selected item n Share selected items . (dot) Move selected items to a new folder z Star or unstar selected items s Add the selected folder to another folder
Create shortcuts to selected itemsShift + z Remove selected items # or Alt + Backspace (Chrome OS)
# or Delete (Windows)
# or Fn + Delete (Mac)Undo the last action Ctrl + z (Chrome OS, Windows)
⌘ + z (Mac)Redo the last undone action Ctrl + Shift + z (Chrome OS, Windows)
⌘ + Shift + z (Mac)Create new items Document Shift + t Presentation Shift + p Spreadsheet Shift + s Drawing Shift + d Folder Shift + f Form Shift + o Open menus Create menu c More actions menu a Current folder actions menu f Sort menu r Settings menu t Application actions Display keyboard shortcuts list Shift + /
Ctrl + / (Chrome OS, Windows)
⌘ + / (Mac)Choose next visual density
(row height and element spacing for list view)q then q Find/find next Ctrl + f (Chrome OS, Windows)
⌘ + f (Mac)Print Ctrl + p (Chrome OS, Windows)
⌘ + p (Mac)Show the last message m Search your Drive / Preview mode actions Close Esc Play/pause Space Zoom in + or = Zoom out –
Pro Tips and Tricks to Get the Most Out of Google Drive
Now that you know about these tricks, and functionality increasing add-ons for various Drive services like Docs, Sheets, etc., you can incorporate them into your daily workflow to become more productive and efficient while using Google’s cloud service. Google Drive has a lot of additional functionality that can be unlocked by using add-ons and chrome apps that work with it. There are several other add-ons and apps that you should check out from the Chrome Webstore, and from within Google Docs, Sheets, and Slides.
If you know of a Google Drive add-on, trick, or Chrome app that you think we might have missed in this article, feel free to let us know about it. We would also like to hear about the ways you use Google Drive to be more productive, both personally and at work. Share your experiences with Google Drive, and thoughts about using it, in the comments section below.


 Abubakar Mohammed
 Arjun Sha

 Shashank Shakya

 Anshuman Jain
 Abubakar Mohammed
 Abubakar Mohammed